Data orchestration is an automated way to manage and organize data from different sources, making it ready for analysis. It’s also known as data pipeline orchestration or data workflow orchestration.
This process covers many parts of data management, such as ensuring data quality, adhering to data governance rules, and automating various tasks. It also involves moving and transforming data through operations like ETL (Extract, Transform, Load). Data orchestration helps organizations use their data effectively by giving them a single view for analysis, reporting, and decision-making. Depending on what they need, organizations might use several orchestration tools together.
Benefits of Data Orchestration
- Integration of Data: Combines data from multiple sources, as part of the Extract, Transform, Load (ETL) process.
- Automation and Efficiency: Uses automated tools and technologies to manage and coordinate data across different systems and applications, reducing the need for manual intervention and increasing efficiency.
- Job Scheduling and Workflow Management: Schedules tasks, manages workflows, and handles dependencies among various jobs.
Demonstration: Creating a Pipeline Using Dataflow and Stored Procedure Activities in Microsoft Fabric
In this section, we will walk through the steps to create a data pipeline using Dataflow and Stored Procedure activities in Microsoft Fabric.
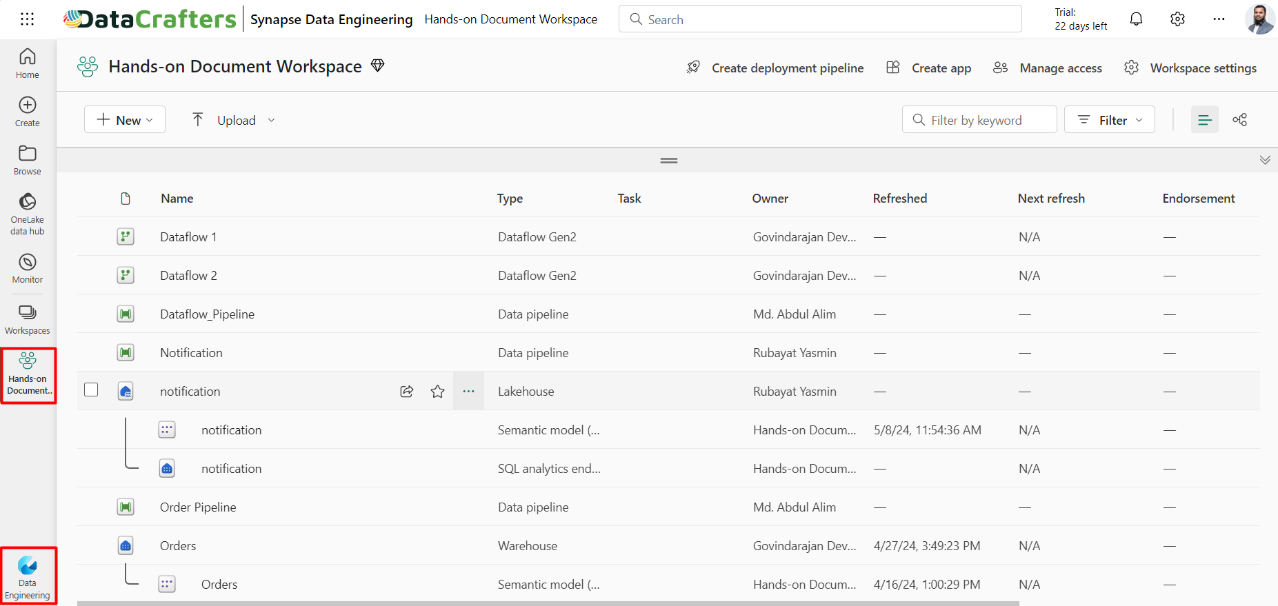
Step 1: Begin by navigating to the appropriate workspace and accessing the Microsoft Fabric data engineering experience.
Step 2: Click on ‘+New’ and select ‘Data Pipeline’ to create a new pipeline.

Step 3: Provide a name for the pipeline and click the ‘Create’ button.

Step 4: You will be presented with an interface where you can select ‘Pipeline activity’.

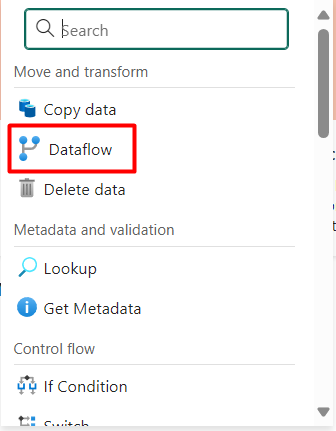
Step 5: After choosing ‘Pipeline activity’, a list of activities will appear. Select ‘Dataflow’ from the list.
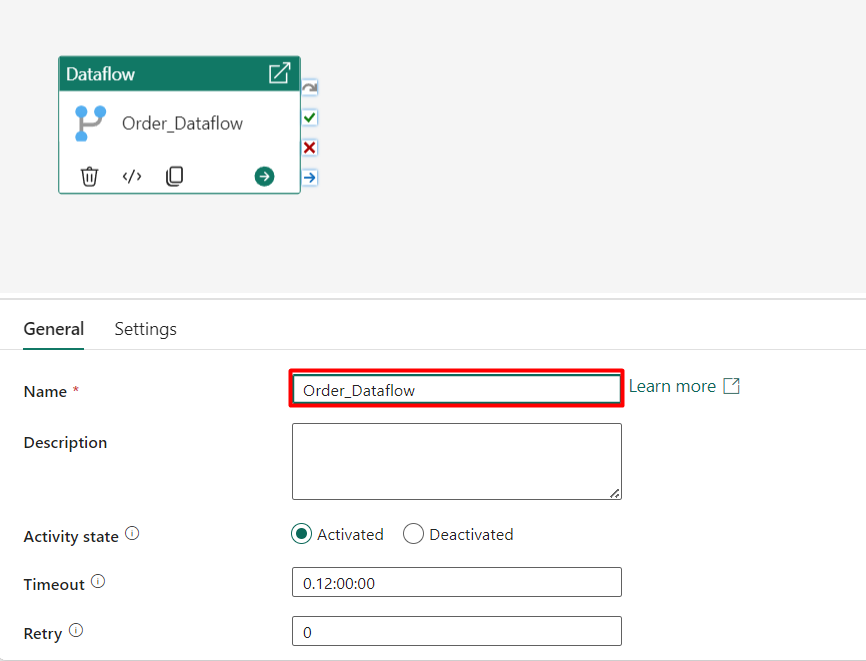
Step 6: Within the ‘General’ tab, rename the Dataflow activity to something meaningful.
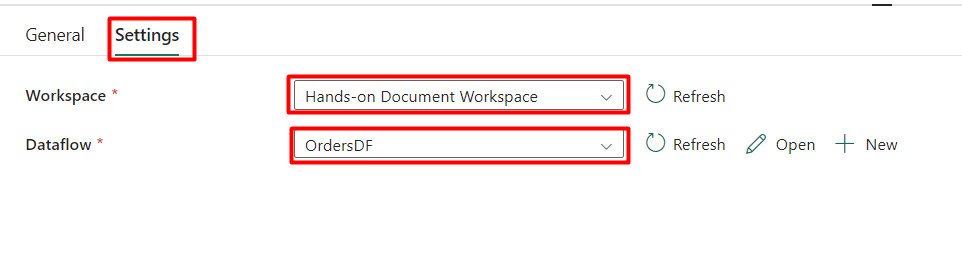
Step 7: In the ‘Settings’ tab, choose the appropriate workspace and the previously created Dataflow Gen2.
Step 8: Next, click on the ‘Add activity’ icon and select ‘Stored Procedure’ from the list of activities.
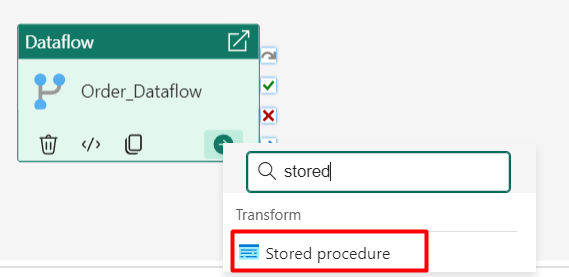
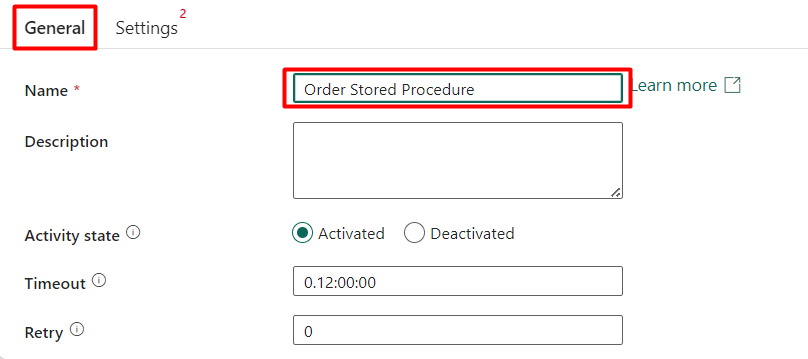
Step 9: Assign a name to the Stored Procedure activity under the ‘General’ tab.
Step 10: In the ‘Settings’ tab, select a suitable connection and the previously created stored procedure from the last blog post here.
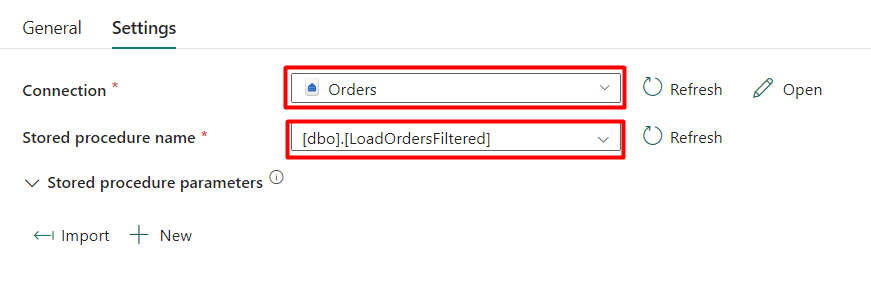
Step 11: Click the ‘Import’ button to bring in the stored procedure parameters, then input a number in the value field.

.

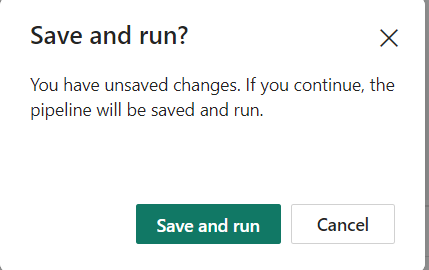
Step 12: Click the ‘Run’ button to execute the pipeline
Step 13: After clicking ‘Run’, you will be prompted to save the pipeline first. Select ‘Save and run’ to save and execute the pipeline.
Step 14: Once the pipeline is running, you can monitor its status.

Step 15: After the pipeline completes its run, it will display a ‘Succeeded’ status along with the two activities.

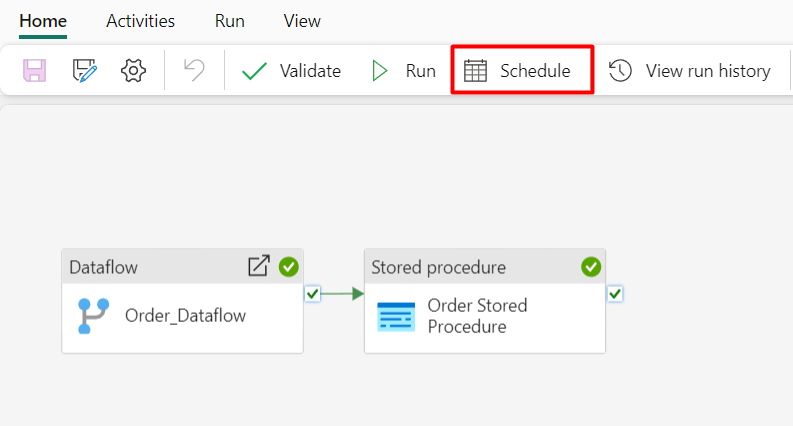
Step 16: You can also set a schedule for the data pipeline. To do this, select the ‘Schedule’ button from the home menu bar.
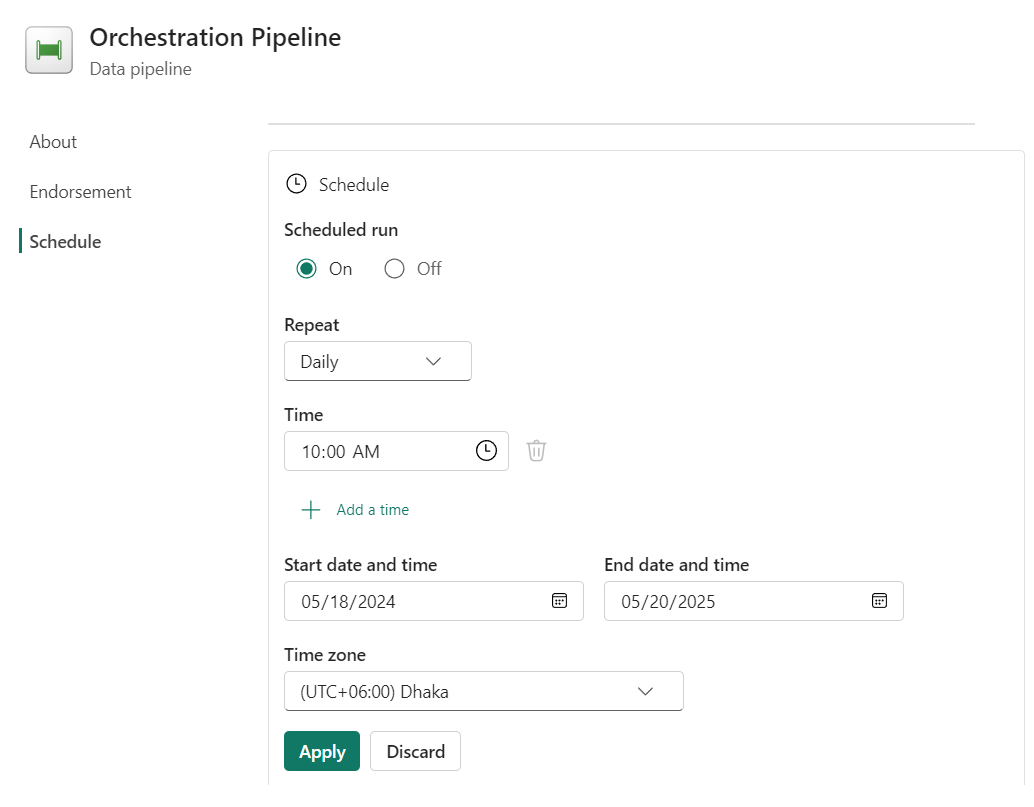
Step 17: Turn on the ‘Schedule run’ option and set the schedule at your preferred time and time zone. After entering the details, click ‘Apply’ to save the schedule.
Conclusion
In this article, we explored data orchestration and its benefits, including data integration, automation, and workflow management. We demonstrated how to implement orchestration in Microsoft Fabric by creating a data pipeline with Dataflow and Stored Procedure activities. We also covered running the pipeline and setting up a refresh schedule.
Data orchestration is a powerful tool for efficiently moving and transforming data, enabling organizations to leverage their data effectively for analysis, reporting, and decision-making. For more step-by-step guides on Data Engineering in Microsoft fabric, check out the rest of the series here [insert link]